Showing posts with label Russia and USSR. Show all posts

Monday, November 12, 2007

Encore 1/72 Polikarpov I-3

Encore kit 1014

Purchased: 
Completed: 12 November 2007
  • Nation: USSR
  • Era: 1920-1929
  • Justification: In the mid-1920s  the newly-formed USSR attempted to modernise its military. Nikolai Polikarpov's I-3 design gave the country an up-to-date fighter.

The kit
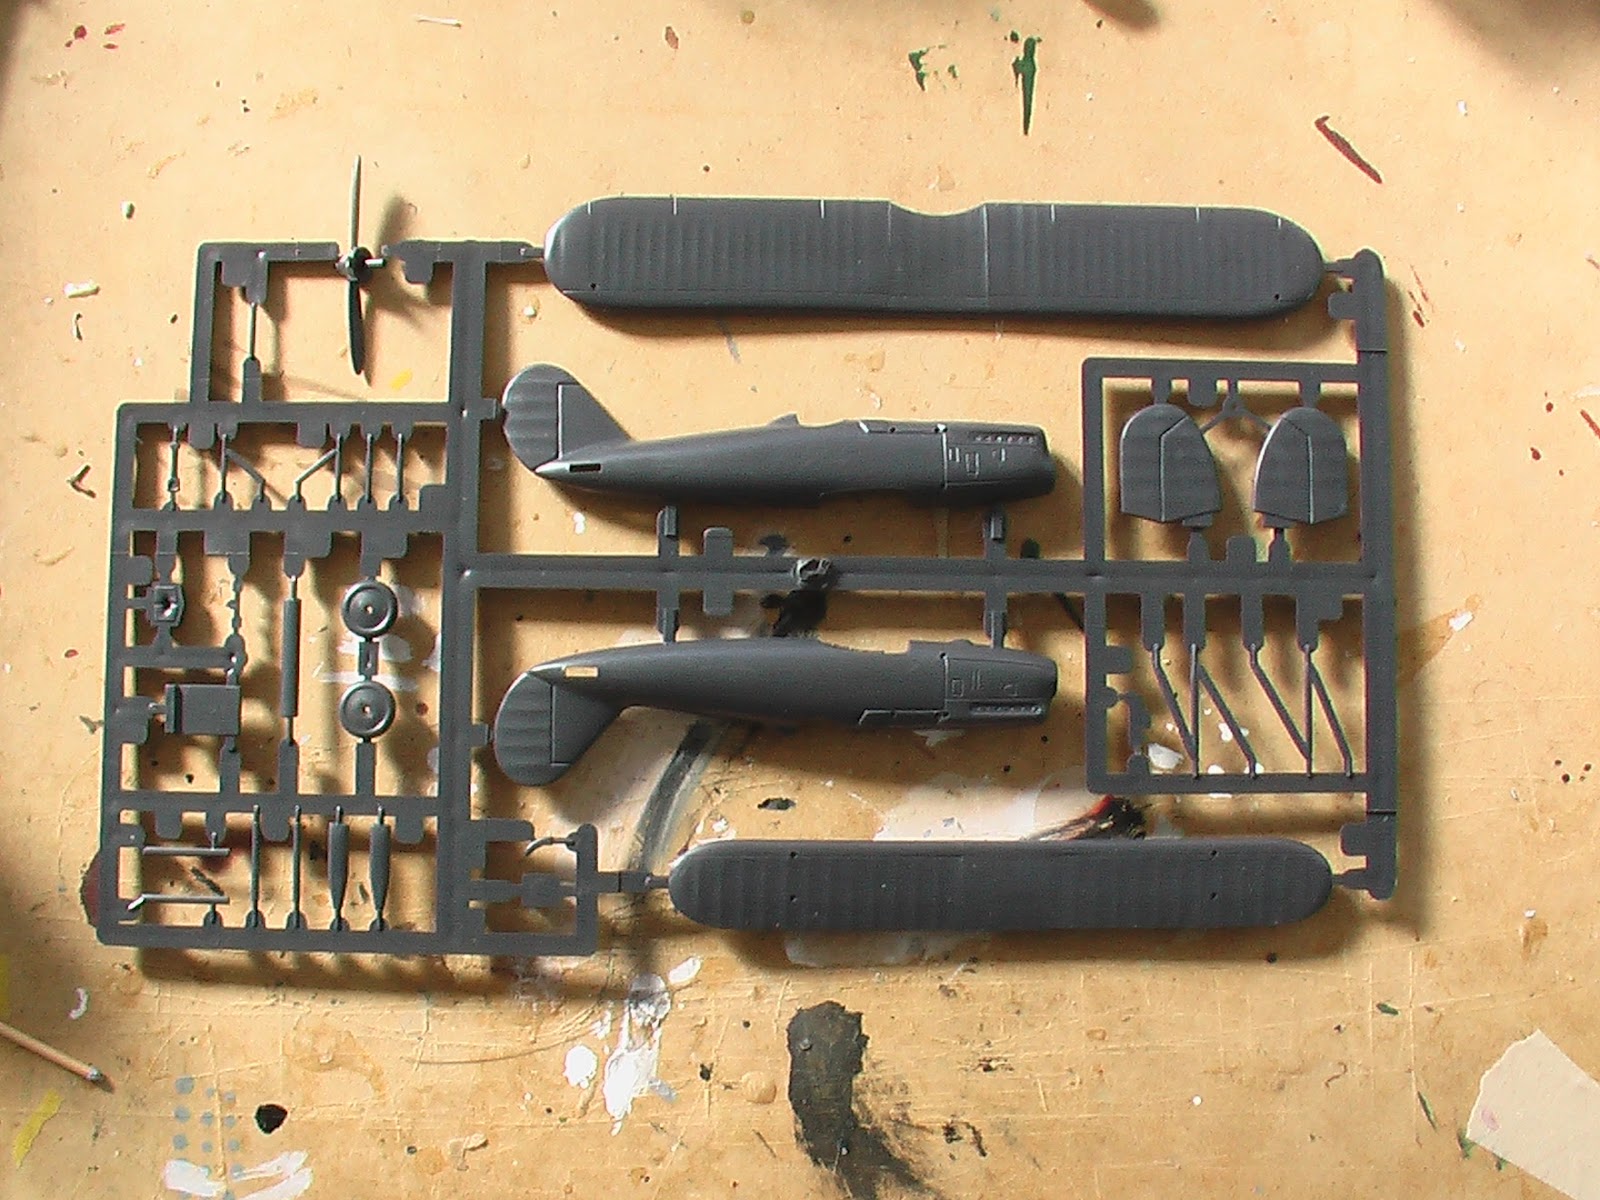
Anyone who builds plastic models on any kind of regular basis knows that the kits on the market can be divided into the easy-to-build "shake and bake" high-tech "Tamigawa" kits on the one hand, and the "character building" kits on the other.

If some part of this hobby is about building patience, then I'll join with Yakov Smirnoff in saying that "In Soviet Russia, model builds YOU"

I don't know much about Encore; but for a while in the 90s they were putting out a really interesting range of kits sourced from other manufacturers and reboxed (hence the company name I guess). Some of these were Heller offerings that while OOP were not terribly rare. Others, like this one, were from various Eastern European manufacturers pretty much unknown in the West. This kit originates with Latvian manufacturer Nakotne,
about which I know nothing else.

The entire kit is moulded on one sprue of dark blue-green plastic with a strange waxy feel. I've encountered this before with other Eastern European kits, so whatever the styrene recipe is, it's not unique to Nakotne. I was intrigued to see how the pattern-makers had worked around the limitations of their low-pressure moulding equipment. The sprue was quite cleverly laid out in order to minimise the attachment points to the parts. Detail overall was soft, and the panel lines around the engine cowling very deep in a Matchbox kind of a way. However, the moulding was generally quite crisp and clean and looked promising. Instructions were basic but perfectly adequate and same for the decals, which represent two Soviet aircraft distinguishable from one another only by their tail number! I wondered why they'd even bothered...

The build

Construction

Anyway, basic construction was very pleasant and easy, with parts fitting very well for a kit of this nature. Quickly, the I-3's racy lines began to emerge, and I was having quite a good time. The only real obstacle I hit was when it came to attach - you guessed it - the struts and the upper wing!
The problem here is that the very same mould engineering ingenuity I was praising eariler led to it being unclear where exactly the struts end and the sprue attachment points begin. Sure, there's a long skinny bit that protudes from the end of the strut, but how much of that are you supposed to leave on? After some deliberation, I concluded that it was all meant to come off. I duly clipped the interplane struts off and glued them in place. The result was not an altogether happy one, though. Doing this meant that the interplane gap ends up being far narrower than the instruction sheet and box art suggest that it should be. In fact, the bottom of the upper wing ended up sitting on the telescopic gunsight. I'm sure that's not right. I toyed with the idea of pulling the wing off again (like I had to do with the B.21) and lengthening the struts (like I had to do with the D.II), but while perusing the internet in search of some kind of definitive plans to show me exactly how far apart the wings should be, I came across build-ups of this kit by far greater modellers than me; and without fail, their interplane gaps were tiny too. This new sense of solidarity led me to throw accuracy to the wind and leave things as they were. For what it's worth, trimming the cabane struts right down to their very ends left them exactly the right length to meet up with their locating holes on the top wing and fuselage. I therefore conclude that the problem lies with the design of the kit rather than my understanding of where I was supposed to cut. Still, this is obviously a major proportional issue for the finished model, so those aiming for accuracy will need to address this. Arranging the undercarriage was a similar exercise. At least here, the outcome looks very much like the illustrations, but does leave me thinking that the stance of the plane looks very "high".

Painting

Painting couldn't have been much simpler - typical Soviet scheme of dark green upper and light blue undersides. I was done in no time!

Rigging and final assembly

Rigging was also very simple - just four pairs of flying/landing wires.

Decals

Decals should also have been a piece of cake; but unfortunately this wasn't the case. With just six national insignia, a tail number and a couple of white "lightning stripes" along the sides, there wasn't much to go wrong. Indeed, this< was so for the first three stars that I applied. But then, the fourth star shattered when I put it in water. The fifth star was OK, and the sixth shattered as well.

Conclusions

It's pretty disheartening to build a model, overcome the obstacles that you meet along the way, get it to the point where you're pretty happy with what you've built, and then have defeat snatched like this from the very jaws of victory. I was feeling pretty lousy when I finally parked my I-3 next to my similarly decalless B.21.

Lessons

If had to build this kit again, I would:
  • Do some research on the correct position of the wings and make or adapt struts to suit.

Images


Wednesday, February 28, 2007

Eastern Express 1/72 Sikorsky S.XVI

Eastern Express kit 72218

Purchased: Hannants, £5.99, photoetch wire wheels from Jadar-Model, zł 32.00
Completed: 28 February 2007 (wheels added in May)
  • Nation: Russia
  • Era: 1910-1919
  • Justification: As far as I can tell, this was the only Russian-built fighter to see squadron service during World War I. Some machines remained in service in secondary roles into the 1920s. 


The kit

This kit is identical with the S.XVI marketed by Dako-plast - indeed, it still bears the Dako-plast name moulded into the single sprue of hard, brittle white styrene and one can see where the Dako-plast logo has been crudely whited-out on the equally crudely photocopied instruction sheet. Classy!

The quality of the moulding is generally good - with really nice, petite detail on the gun for example. Another, more knowledgeable reviewer has pointed out a number of deficiencies with the kit, including it being about 10% underscale and not representing any particular variant of the S.XVI, but rather, a conglomeration of features from different ones. Decals are provided for a single, generic machine. This is perhaps fortunate because that the paint plan on the poorly-reproduced instructions is useless. With such a simple paint scheme, this isn't an issue though. Options are provided for either wheeled or ski undercarriage, and therein lies one of the kit's greatest shortcomings. The exposed, wire-spoked wheels are a distinctive feature of this aircraft, but here, the four mainwheels are provided with solid hubs - as if they represented canvas-covered wheels. I knew from the outset that I wanted wire wheels, so ordered an Eduard set which three weeks later unfortunately still hasn't graced my mailbox at the time of writing.

One real peculiarity of the kit is the parts breakdown. While it's common for small 1/72 aircraft kits to have a one-piece wing that the fuselage halves sit atop of, generally the cutout on the fuselage halves matches the airfoil shape of the wings. For whatever reason in this case, Dako-plast chose to make this cutout rectangular, and included a rectangular chunk of lower fuselage moulded integrally with the one-piece wing. When you see something as bizarre as this, you just know that it doesn't bode well!

A reasonably detailed little cockpit is provided - with a full forward bulkhead, steering wheel (yes!), and rudder bar. This is fortunate, since the cockpit is one of the most exposed that I've ever seen. A superdetailer could go really nuts here. I am not that superdetailer.


The build

Construction

While the major airframe components went together quite well, this kit's devil is definitely in the detail. The main problem early on was, as predicted, the weird wing-to-fuselage joint. This required lots of putty and lots of sanding to get to an acceptable finish. And then there was still a bit more sanding!

The problems with this kit are many, but mostly reflect very sloppy engineering with regard to the fit, placement, and thickness of parts. My experiences, I'm happy to note, paralleled those of Michael Kendix's review that I referred to earlier, and I take comfort in the fact that "it's not just me"!  I'll cheerfully confirm Michael's observations that:
  • the fuselage won't fit over the cockpit assembly unless the cockpit firewall is considerably reduced in height first
  • the alignment of the fuselage halves is poor (I'll actually disagree with Michael here and say that it is a bigger deal than usual, on account of the fact that the top and bottom of the fuselage on the S.XVI are completely flat surfaces, which makes sanding a real pain)
  • the engine cowling won't fit over the engine unless the thickness of the cowling is reduced dramatically. I was especially grateful to have forewarning of this, as I think it would have caused me no end of grief had I blundered into it unaware.
  • The location of the machine gun and ammunition chute is anyone's guess really. The only clue provided by Dako-plast, a groove in the forward fuselage, is clearly not an option since in that spot the gun will foul one of the cabane struts. Going on my limited references on this aircraft, it seems to me that the proportions of the kit are quite off in this area, which can't help. The gun also looks a little big to me, making me wonder whether the gun at least is around 1/72 when the airframe around it is in a smaller scale?
In the end, this is all just griping though, and there's nothing here that persistent sanding and a little jiggling about of parts won't fix.

Painting

While there's no surviving example of an S.XVI known anywhere in the world, a full-scale replica was built by a group of Russian enthusiasts and finished by Sikorsky in the United States. It resides at the New England Air Museum in Connecticut and I chose to model this aircraft, not only as the closest thing to a real S.XVI in existence, but because of it's easy and generic markings, that incidentally match the ones provided with the kit!

The whole aircraft was painted in a Clear Doped Linen colour mixed roughly half-and-half from Tamiya Flat White XF-2 and Buff XF-57. The engine cowling and forward fuselage were then brush-painted Flat Aluminium XF-16 and that was it! Yay!

Rigging and final assembly

Rigging was pretty straight forward, although I did experience more breaks than normal, probably because the strut attachment points are pretty weak on this model. In fact, the cabane struts are simply butt-jointed to the fuselage sides. In retrospect, I wonder whether I should have cemented these on before the first coat of paint went on - a bare-styrene-to-bare-styrene cemented joint being undoubtedly stronger than an acrylic-painted-styrene-to-acrylic-painted-styrene CA'd joint. Rigging the intricate undercarriage assembly was tedious, but not especially difficult in any way.

I've left the wheels off while I await their photoetched replacements.

Decals

Decals were pleasantly thin and in register and their application was entirely unremarkable. Good!


Conclusions

This provided a nice, relatively simple build. A bit dear for what you get in the box, but that's expected to some degree for these obscure subjects. While there were undeniable problems with the kit, these were no greater or more problematic than those of the average short-run product. While apparently not really that accurate, the finished model does capture the S.XVI's ungainly stance quite accurately. I was left with the impression that having mastered aeronautical ugliness to this degree so early on, helicopters were just the next natural step for Sikorsky! :)

Lessons

This list would have been a long one if Michael Kendix hadn't taken the fall for me! But if I had to build this kit again, I would:
  • try and achieve more solid attachment of the struts from the outset, to make rigging neater and less painful later.


Postscript: Wheels

Well, the Eduard photoetched wire wheels (set 72-439) arrived after a few weeks. The set is a single photoetched fret with finely-etched discs to represent spoked wheels in eight sizes (four discs per size). Each set of four is to equip a single model, since Eduard suggests that you lightly dish the discs using a ball bearing and then attach them concave-side to concave-side before adding a tyre. With double the number of wheels on this aircraft to begin with, laziness once again got the better of me and I resolved to just use one (un-dished) disc to represent each wheel. The big question was: what to do about tyres? Advice I solicited online was either to find a suitably-sized rubber grommet to fit, or cut discs from a length of styrene tube. I chose to do something like the second suggestion. I took the kit wheels, then sawed them in half across their discs (much easier than it sounds - I simply ran them gently back and forth along a razor saw blade until they parted) then drilled out their centres to leave only tyres remaining. I then glued them back together with the photoetch discs in the middle, and used copious amounts of putty to fill the resulting gaps. This made a world of difference as against the kit-supplied solid centres, and I'm very glad I used them.


Images