Encore kit 1014

Purchased:
Completed: 12 November 2007
Completed: 12 November 2007
- Nation: USSR
- Era: 1920-1929
- Justification: In the mid-1920s the newly-formed USSR attempted to modernise its military. Nikolai Polikarpov's I-3 design gave the country an up-to-date fighter.
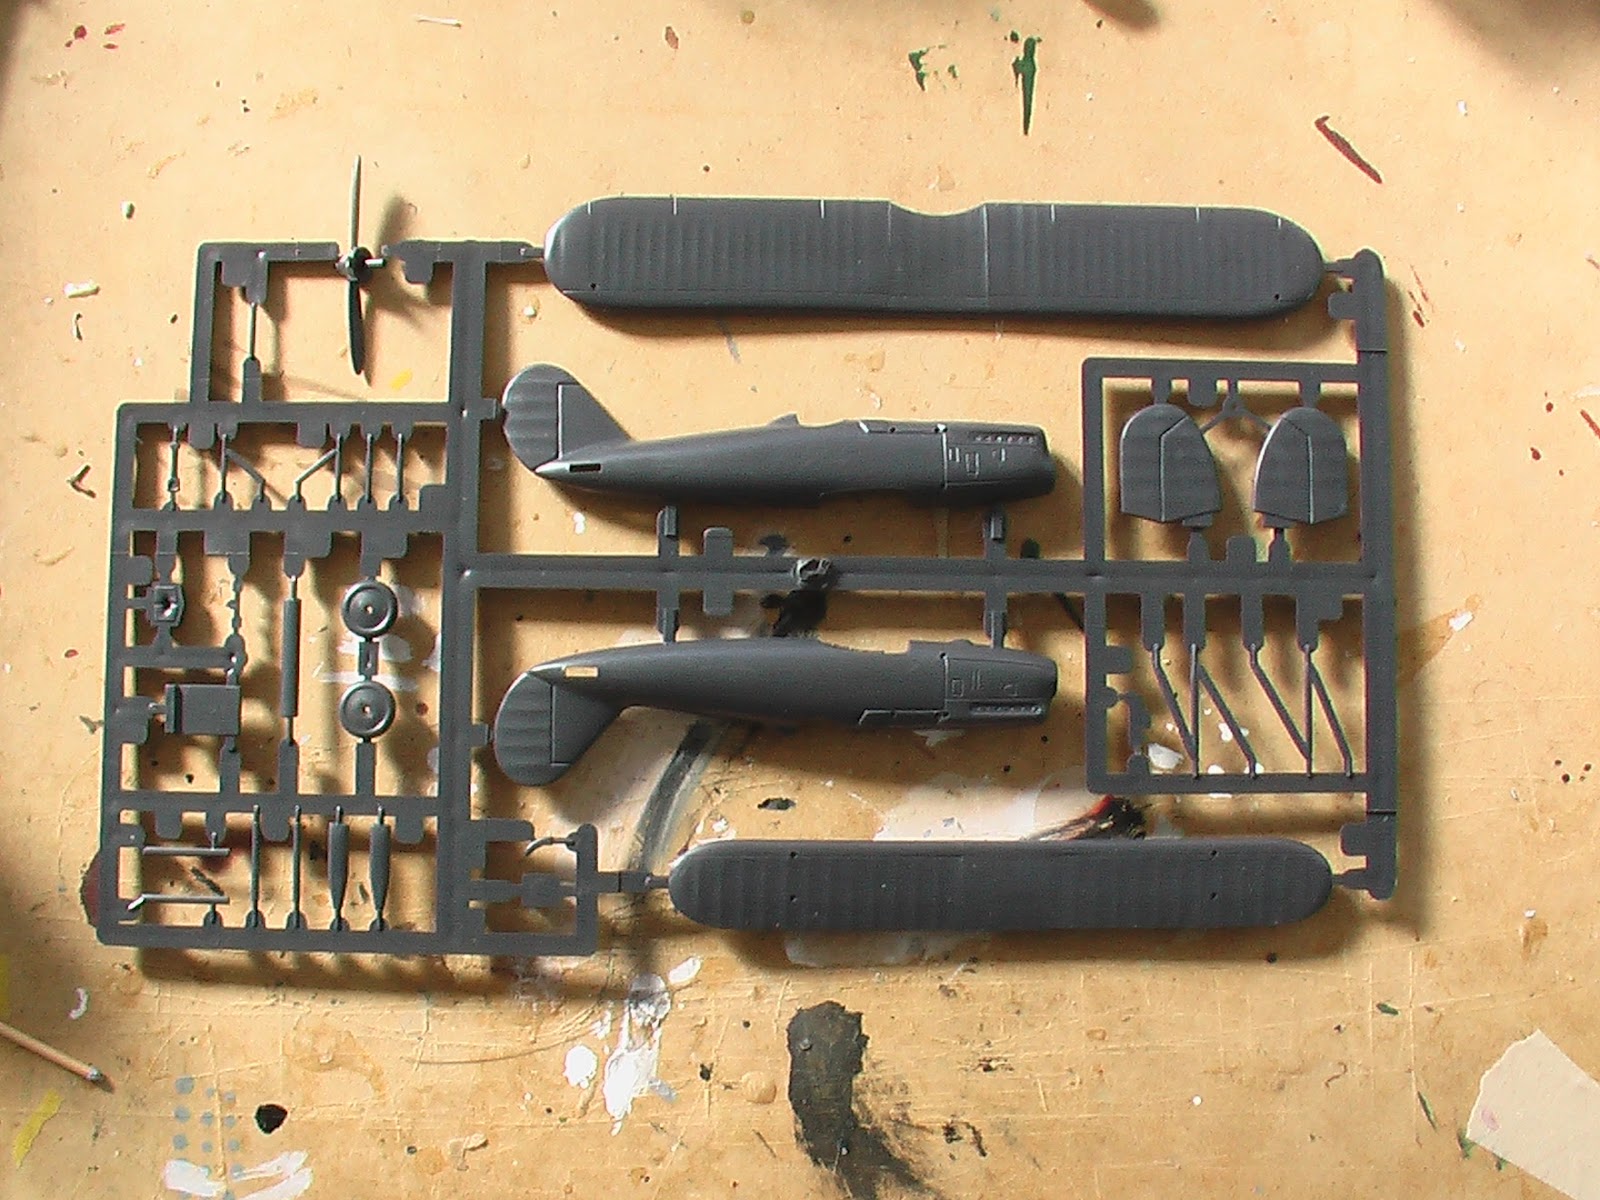
The kit
If some part of this hobby is about building patience, then I'll join with Yakov Smirnoff in saying that "In Soviet Russia, model builds YOU"
I don't know much about Encore; but for a while in the 90s they were putting out a really interesting range of kits sourced from other manufacturers and reboxed (hence the company name I guess). Some of these were Heller offerings that while OOP were not terribly rare. Others, like this one, were from various Eastern European manufacturers pretty much unknown in the West. This kit originates with Latvian manufacturer Nakotne,
about which I know nothing else.
The entire kit is moulded on one sprue of dark blue-green plastic with a strange waxy feel. I've encountered this before with other Eastern European kits, so whatever the styrene recipe is, it's not unique to Nakotne. I was intrigued to see how the pattern-makers had worked around the limitations of their low-pressure moulding equipment. The sprue was quite cleverly laid out in order to minimise the attachment points to the parts. Detail overall was soft, and the panel lines around the engine cowling very deep in a Matchbox kind of a way. However, the moulding was generally quite crisp and clean and looked promising. Instructions were basic but perfectly adequate and same for the decals, which represent two Soviet aircraft distinguishable from one another only by their tail number! I wondered why they'd even bothered...
The build
Construction
Anyway, basic construction was very pleasant and easy, with parts fitting very well for a kit of this nature. Quickly, the I-3's racy lines began to emerge, and I was having quite a good time. The only real obstacle I hit was when it came to attach - you guessed it - the struts and the upper wing!The problem here is that the very same mould engineering ingenuity I was praising eariler led to it being unclear where exactly the struts end and the sprue attachment points begin. Sure, there's a long skinny bit that protudes from the end of the strut, but how much of that are you supposed to leave on? After some deliberation, I concluded that it was all meant to come off. I duly clipped the interplane struts off and glued them in place. The result was not an altogether happy one, though. Doing this meant that the interplane gap ends up being far narrower than the instruction sheet and box art suggest that it should be. In fact, the bottom of the upper wing ended up sitting on the telescopic gunsight. I'm sure that's not right. I toyed with the idea of pulling the wing off again (like I had to do with the B.21) and lengthening the struts (like I had to do with the D.II), but while perusing the internet in search of some kind of definitive plans to show me exactly how far apart the wings should be, I came across build-ups of this kit by far greater modellers than me; and without fail, their interplane gaps were tiny too. This new sense of solidarity led me to throw accuracy to the wind and leave things as they were. For what it's worth, trimming the cabane struts right down to their very ends left them exactly the right length to meet up with their locating holes on the top wing and fuselage. I therefore conclude that the problem lies with the design of the kit rather than my understanding of where I was supposed to cut. Still, this is obviously a major proportional issue for the finished model, so those aiming for accuracy will need to address this. Arranging the undercarriage was a similar exercise. At least here, the outcome looks very much like the illustrations, but does leave me thinking that the stance of the plane looks very "high".
Painting
Painting couldn't have been much simpler - typical Soviet scheme of dark green upper and light blue undersides. I was done in no time!Rigging and final assembly
Rigging was also very simple - just four pairs of flying/landing wires.Decals
Decals should also have been a piece of cake; but unfortunately this wasn't the case. With just six national insignia, a tail number and a couple of white "lightning stripes" along the sides, there wasn't much to go wrong. Indeed, this< was so for the first three stars that I applied. But then, the fourth star shattered when I put it in water. The fifth star was OK, and the sixth shattered as well.Conclusions
It's pretty disheartening to build a model, overcome the obstacles that you meet along the way, get it to the point where you're pretty happy with what you've built, and then have defeat snatched like this from the very jaws of victory. I was feeling pretty lousy when I finally parked my I-3 next to my similarly decalless B.21.Lessons
If had to build this kit again, I would:- Do some research on the correct position of the wings and make or adapt struts to suit.
Images


